Easter is about Jesus. It's about the sacrifice he made on the cross and his victory over death three days later. It can be difficult, to say the least, to explain these concepts to small children, so I've gathered seven different activities from all over the web to help you.
Don't think for a minute that we do every single one of these in our home. We don't. I'm not superwoman. I'm just a mom trying to point my children toward Jesus on one of the most important days of the year. Sometimes we do that by reading a book, sometimes through making resurrection rolls, and sometimes through Easter crafts. It's all about finding what works best for your family and going for it.
So, without further ado, here are a few simple activities you can use to teach your children about Easter.
1. Make Resurrection Rolls. I've done this with Micah on the Saturday before Easter for the past couple of years. She loves dipping the marshmallows in butter and rolling them in cinnamon sugar before wrapping them up in crescent rolls. These are a great object lesson for Jesus' burial and resurrection. The marshmallow is Jesus, the butter and cinnamon sugar are the oil and spices used to anoint his body, the crescent roll is the tomb. While the rolls bake, the marshmallow melts and leaves the inside hollow, representing the empty tomb. These are hands down our favorite Easter activity. Eat at Allie's has a great tutorial and recipe for Resurrection Rolls with step by step instructions.
2. Read Books that Explain the Resurrection Story. My Easter Basket and the True Story of Easter is one of our favorites. We picked it up at a consignment store when Micah was teeny tiny, and we love it. The story uses the colors in the basket and an easy-to-remember rhyme to describe the important parts of the Easter story.
3. Countdown to Easter. I love the idea of counting down to Easter with an Easter calendar - just like we count down to Christmas with an Advent calendar. Kojo Designs created the Easter egg countdown pictured here, and her tutorial includes a list of activities to hide in the eggs each day. We haven't done this in the past, but as my girls get older, I think it's something we'll try to incorporate into our traditions.
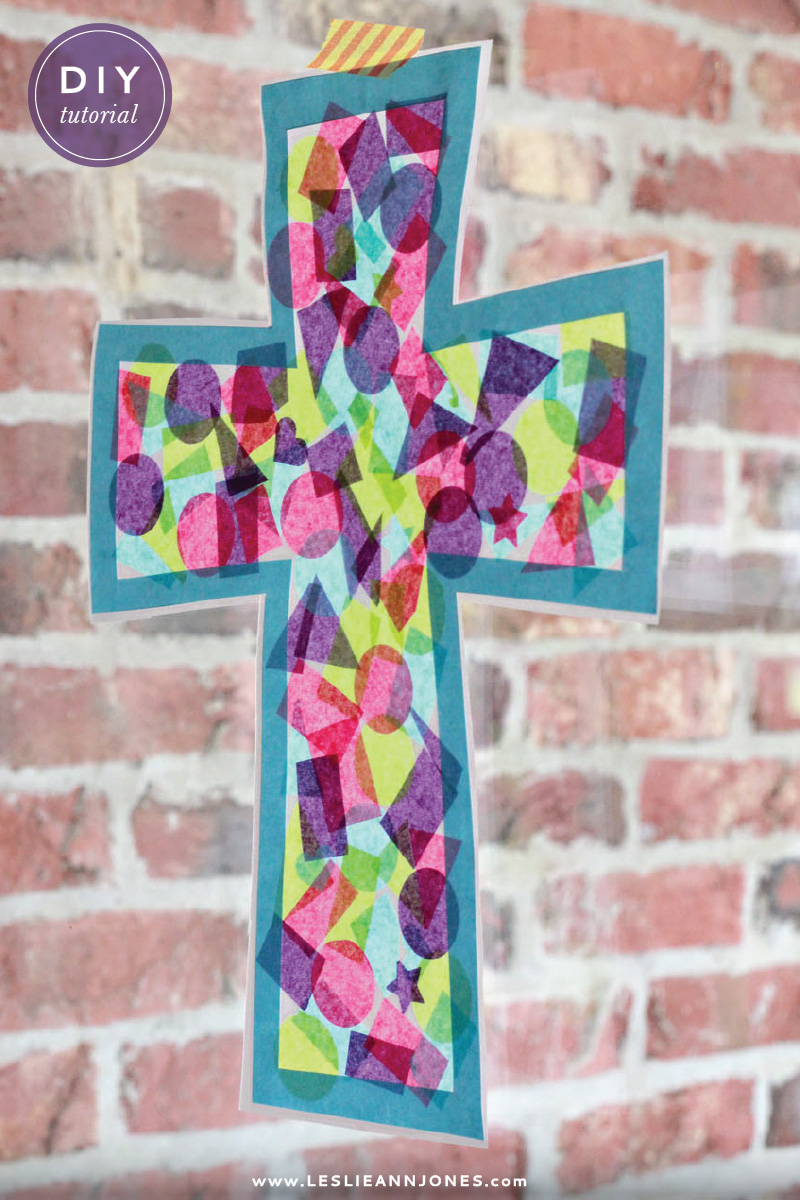
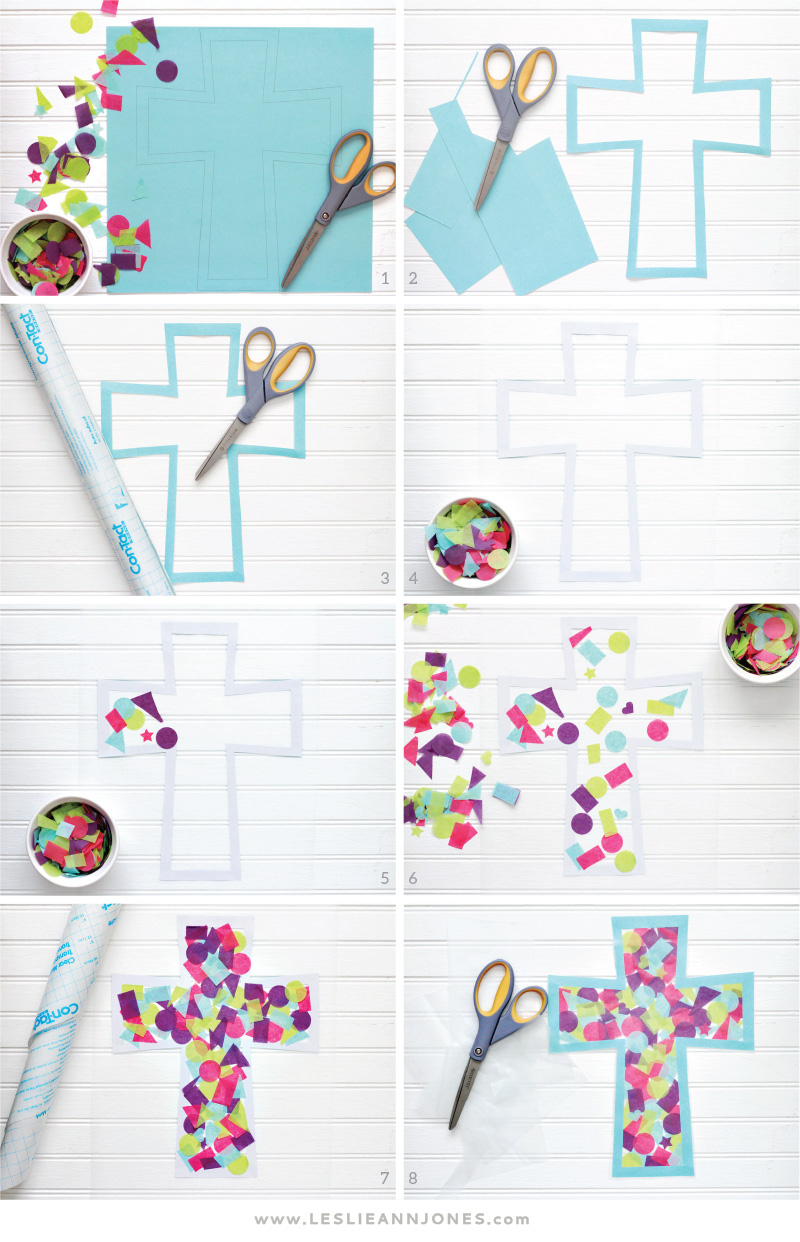
4. Make Faux Stained Glass Crosses. The cross is central to the Easter story, and you can talk about it with your children while you make these pretty and simple confetti stained glass crosses. We did this a few weeks ago, and both girls enjoyed it immensely. It's an easy enough craft for Kendall (who's almost two) to do, and Micah had a great time as well. The crosses are currently hanging on the back door, serving as a visual reminder that Easter is right around the corner.
5. Use Resurrection Eggs to Share the Story of Easter. This is a simple and beautiful concept that you can use to point your children toward Scripture and Jesus this season. You can buy a set of resurrection eggs to use, or, if you're feeling crafty, you can make your own like these from sugar lander, these from Delia Creates, or these from Life Your Way. Mandi at Life Your Way even provides little printable cards for each egg to explain the contents and the corresponding Scripture. So cute.
6. Create a Resurrection Garden. If I can manage to swing it, we're going to make one of these this year. I've seen several versions floating around Pinterest, but my favorite is this resurrection garden from Oh Amanda. I love the fact that she replaced the wilted, dying foliage with vibrant, colorful flowers on Easter morning, a visual reminder of the new life we have in Christ. This seems like a really fun way for kids to get their hands dirty and really get a sense of what Easter is all about.
7. Use A Sense of the Resurrection to Direct Your Conversations. A Sense of the Resurrection is a fantastic e-book by Oh Amanda that includes tutorials for 12 Scripture-based Easter activities to do with your children. Some of the activities are simple, like washing each others' feet as you explain that Jesus washed the feet of the disciples on the night he was arrested. Other activities are more involved, like the wind chime you can make to remember the Triumphal Entry. All the activities will help your children understand the different parts of the Easter story and give them an appreciation for what Jesus did on the cross.

Until next time, grace and peace.