Tutorials

How To Tuesday: Fabric Flower Bouquet

It's Tuesday, which means it's time for another fun little tutorial. Since Mother's Day is right around the corner, I thought it would be fun to share a simple project that would make a fabulous handmade gift for all the wonderful mothers out there.

no sew fabric flower bouquet

{photo credit Dana-Made-It}

Enter this pretty no-sew flower bouquet from Dana-Made-It. I love its whimsy, AND the fact that you need next to nothing to actually make the little blooms.

The best thing about these flowers? They don't die.

Be sure to click through to Dana-Made-It for the full tutorial.

Happy crafting!

Until next time, grace and peace.

How to Tuesday: Rolled Felt Flower Wreath

Welcome to How To Tuesday, where I'll introduce you to some of my favorite DIY craft projects from all over the web. I have a folder bookmarked on my computer that's chock-full of fun DIY projects. I saved some of the ideas for inspiration and others because I just thought they were pretty or fun, and now I'm sharing them with you.

Do you like my new wreath? I've been meaning to make this wreath for months now. Just ask Dennis. I picked up the fabric and grapevine wreath at Hobby Lobby a couple of months ago, and it's been sitting on my counter since then. Last weekend, I finally had a chance to put all the pieces together, and I'm really proud of it. Here's another look for you.

I've been seeing these beautiful felt flower wreaths all over etsy, and I knew that they couldn't be that difficult to make, so I started hunting for some tutorials on the internet. First, I made some rolled fabric flowers using the instructions from My Sparkle that I shared with you a couple of weeks ago. Next, I made some felt flowers using this tutorial from Take Heart. After I had the flowers made, I snipped a sprig of red berries off an arrangement in my kitchen and hot glued it all to the wreath. That's it! Done!

I love my new wreath, and once I got started, it was super simple to make. Be sure to visit the links to My Sparkle and Take Heart to learn how to make the flowers, then get to work on prettying up your own door!

Until next time, grace and peace.

How To Tuesday: Paper Pinwheel Mobile

Welcome to How To Tuesday, where I'll introduce you to some of my favorite DIY craft projects from all over the web. I have a folder bookmarked on my computer that's chock-full of fun DIY projects. I saved some of the ideas for inspiration and others because I just thought they were pretty or fun, and now I'm sharing them with you.

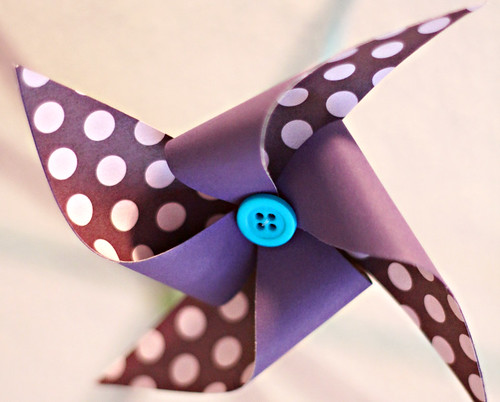
DIY-paper-pinwheel

This week, I bring you paper pinwheels from The Sweetest Occasion. When Cyd posted this tutorial last week, I knew that I'd have to share it with you, because I actually made these for a mobile in Micah's room before she was born.

In true Leslie Ann fashion, I waited until the day before she was born to tackle the project, but thanks to some late night help from my mom, we got it done. Micah loves her mobile, and it's really cute when she stands underneath it in her bed and blows as hard as she can to make them turn.

paper-pinwheel-mobile

See? Isn't it cute?

If you're looking for a cute and easy way to add a handmade touch to your baby's room, you must click through to read the instructions on how to make one of these mobiles. I used buttons and fishing twine to hold the pinwheels together, but I suggest using brads as the tutorial indicates. I'm sure they're much easier to manage. Since I waited so long to make the mobile, I just used the materials we had on hand to suspend the pinwheels, which happened to be a few dowels. It just goes to show that if you don't have all the materials listed, you can probably make it work with what you've got.

So what are you waiting for? Head on over to the Sweetest Occasion and get started on some pinwheels!

Until next time, grace and peace.